该示例程序支持以下功能:
- 支持 Host 主机通过 USB 无线上网。
- 支持 Host 主机通过 USB 对 安信可 ESP-12K 模组进行通信和控制。
- 支持多种 system、Wi-Fi 控制命令,使用 FreeRTOS-Plus-CLI 命令行接口,易拓展更多命令。
- 支持热插拔
硬件准备
只有具有 USB-OTG 外设的 ESP 芯片才需要引脚分配。 如果您的电路板没有连接到 USB-OTG 专用 GPIO 的 USB 连接器,您可能需要自己动手制作电缆并将 D+ 和 D- 连接到下面列出的引脚
ESP BOARD          USB CONNECTOR (type A)
                          --
                         | || VCC
[USBPHY_DM_NUM]  ------> | || D-
[USBPHY_DP_NUM]  ------> | || D+
                         | || GND
--| 模组 | USB_DP | USB_DM |
|---|---|---|
| 安信可 ESP32-S2/S3 系列模组 | GPIO20 | GPIO19 |
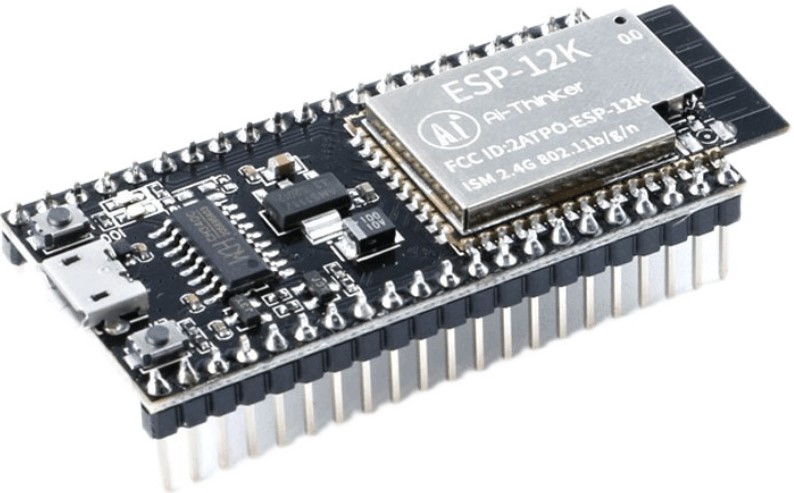
- ESP32-12K-KIT 开发板
编译代码
- 确认 ESP-IDF 环境成功搭建,使用
master分支 - 添加 ESP-IDF 环境变量,Linux 方法如下,其它平台请查阅 Set up the environment variables
. $HOME/esp/esp-idf/export.sh
- 下载源码:https://github.com/xuhongv/StudyInEsp32/tree/master/23_usb_dongle_wifii
- 设置编译目标为
esp32s2或esp32s3
idf.py set-target esp32s2
- 编译、下载、查看输出
idf.py build flash monitor
使用说明
- 完成上述硬件准备并成功烧录固件后,将 USB 连接至 PC 端
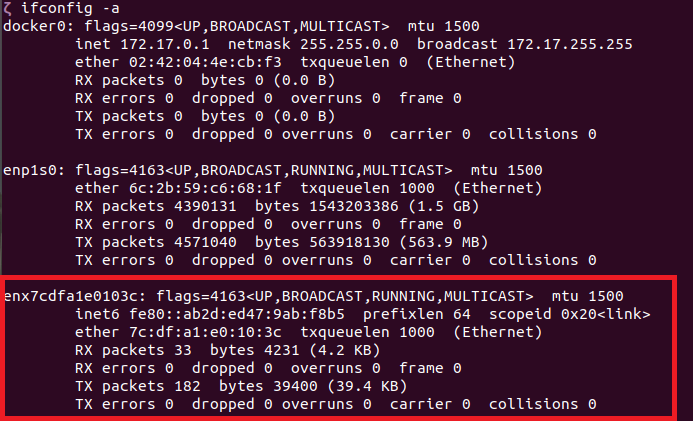
- PC 端将会新增一个 USB 网卡以及一个 USB 串口
- Linux 端可通过以下命令来查看新增 USB 设备,Windows 端可通过设备管理器来查看 USB 设备
ifconfig -a
ls /dev/ttyACM*

- 通过 USB 串口与 ESP 设备进行通信,波特率 115200 ,使用 help 命令来查看目前所支持的所有指令
- 通过指令来控制 ESP 设备进行配网操作
注意!
当设备已经连上一个路由器,但你需要重新切换路由器时,需要在执行 sta 或者 smartconfig 配网命令后执行以下操作
查看 USB 网卡名称>ifconfig >
卸载 USB 网卡>ifconfig down >
装载 USB 网卡>ifconfig up >
命令说明
1.help
Function:
列出所有注册的命令
Command:
helpResponse:
help:
 Lists all the registered commands

ap <ssid> [<password>]: configure ssid and password
sta -s <ssid> [-p <password>]: join specified soft-AP
sta -d: disconnect specified soft-AP
mode <mode>: <sta> station mode; <ap> ap mode
smartconfig [op]: op:1, start smartconfig; op:0, stop smartconfig
scan [<ssid>]: <ssid>  SSID of AP want to be scanned
ram: Get the current size of free heap memory and minimum size of free heap memory
restart: Software reset of the chip
version: Get version of chip and SDK
>
2.ap
Function:
设置 AP 模式、查询 AP 设置
Set Command:
ap Soft_AP espressifQuery Command:
apResponse:
AP mode:Soft_AP,espressif
>
Note:
password 为可选项,若不配置默认不加密
3.sta
Function:
启动 Station 模式、查询所连接 AP 信息
Set Command:
sta -s AP_Test -p espressifQuery Command:
staResponse:
<ssid>,<channel>,<listen_interval>,<authmode>
>| authmode_value | mode |
|---|---|
| 0 | WIFI_AUTH_OPEN |
| 1 | WIFI_AUTH_WEP |
| 2 | WIFI_AUTH_WPA_PSK |
| 3 | WIFI_AUTH_WPA2_PSK |
| 4 | WIFI_AUTH_WPA_WPA2_PSK |
| 5 | WIFI_AUTH_WPA2_ENTERPRISE |
| 6 | WIFI_AUTH_WPA3_PSK |
| 7 | WIFI_AUTH_WPA2_WPA3_PSK |
| 8 | WIFI_AUTH_WAPI_PSK |
Note:
password 为可选项
Function:
断开与 AP 的连接
Set Command:
sta -dResponse:
OK
>
4.mode
Function:
设置 WiFi 模式
Command:
- 设置 Station 模式
mode sta
- 设置 AP 模式
mode ap
5.smartconfig
Function:
- 开启 SmartConfig 配网
Command:
smartconfig 1
Response:
    >SSID:FAST_XLZ,PASSWORD:12345678
    OK
    >
- 关闭 SmartConfig 配网
Command:
smartconfig 0
Response:
    OK
    >
Note:
>使用 smartconfig 1 命令开启 SmartConfig 配网并成功连接后,不需要再使用 smartconfig 0 命令来关闭 SmartConfig 配网
>
>smartconfig 0 命令只需要在 SmartConfig 配网失败时进行调用
配网步骤:
* 下载 ESPTOUCH APP :Android source code iOS source code
* 确保你的手机连接至目标 AP(2.4GHz)
* 打开 ESPTOUCH APP 输入 password 并确认
* PC 端通过 USB 端口发送smartconfig 1命令
6.scan
Function:
扫描 AP 并列出对应 SSID 以及 RSSI
Command:
- 扫描特定 AP
scan <SSID>
- 扫描所有 AP
scan
Response:
>
[ssid][rssi=-22]
7.ram
Function:
获取当前剩余内存大小以及系统运行期间最小时内存大小
Command:
ramResponse:
free heap size: 132612, min heap size: 116788
>
8.restart
Function:
重启系统
Command:
restart9.version
Function:
获取当前 IDF 版本以及芯片信息
Command:
versionResponse:
IDF Version:v4.4-dev-2571-gb1c3ee71c5
Chip info:
	cores:1
	feature:/802.11bgn/External-Flash:2 MB
	revision number:0
>
讨论交流

QQ群号:434878850

本人微信公众号:徐宏blog

私人工作微信,添加标明来意